
Learning how to start a new garden can feel overwhelming, but creating a productive growing space is simpler than you might think. While choosing a slice of yard to cut into may feel intimidating, the process of starting fresh garden ground can be simple and straightforward. The reward for these “one-time” steps is a garden space that produces vigorously with longevity.

Step 1: Plan the New Garden Location
In general, most people who go to break ground on a new garden space will have a spot picked out. However, there are a few key insights that can affect the productivity of the space that can be considered before planting.
For our new garden space, we began our planning during the summer. This timing corresponded to our move, but was beneficial for giving us time and heat. Summer gave us long days to measure, plot and plan without the pressure of getting crops into the ground for the fall. We knew our first plants would go into the ground in the fall, or early spring. The heat helped us burn grass via occultation for our garden space instead of tilling living grass, or dormant grass and seeds.
We also considered how much garden space we would need to fit the amount of crops we wanted. Summer uses the most square footage, and to fit flowers, herbs and veggies in the volume we desired, we opted for an in-ground system with separate spaces for berries, trees and herbs. After working with our past garden, we concluded that it is also more cost effective and helpful to use market standards for our bed and walkway widths. This helps us when purchasing insect netting or polytunnels, as well as irrigation.
Standard market rows are 30” wide with 12-18” wide walk ways at 50-100’ in length.
Since we had time, we also observed. We could note where land was uneven, where water ran and puddled during storms, where shadows casted, and more. This helped us with garden bed orientation and placement. We saw squirrels and deer, which means our garden space will require fencing. There were several spaces on the property that supported the garden with these elements, but our final choice was based on location to water spigots. No one wants to have to trench plumbing 300’ (again)!
Key points:
Consider the timing
Consider needs
Consider the dimensions and square footage
Consider pests, wind, sun and slope
Consider water source
Step 2: Kill Grass Naturally with Occultation
Occultation, or “tarping”, is an organic gardening method that uses dark, light blocking tarps to kill weeds, grass or cover crops without tilling or chemicals.
Tarping does not use a “camping tarp”, which is often a woven plastic material. It does require a single ply plastic that is black for heat transfer, typically 6 mil thick. This thickness does help prevent wear in the sun and allow the plastic to be used beyond one season.
We found several options for acquiring the appropriate width and length to cover our space. Amazon sells tarp in 50-100 ft lengths at various widths. Boot Strap Farmer sells multiuse plastics that can be dually used to cover greenhouses for shade and more. Farm Plastic Supply sells custom lengths at set widths for a perfect fit. There are old billboard canvas for sale on Facebook Marketplace at a much lower price, with a much wider variety of sizes that require cutting down. For economics and ease, we chose to use rolls of plastic sheeting from Home Depot, which ran us around $40 per roll for 10×50’ per roll.
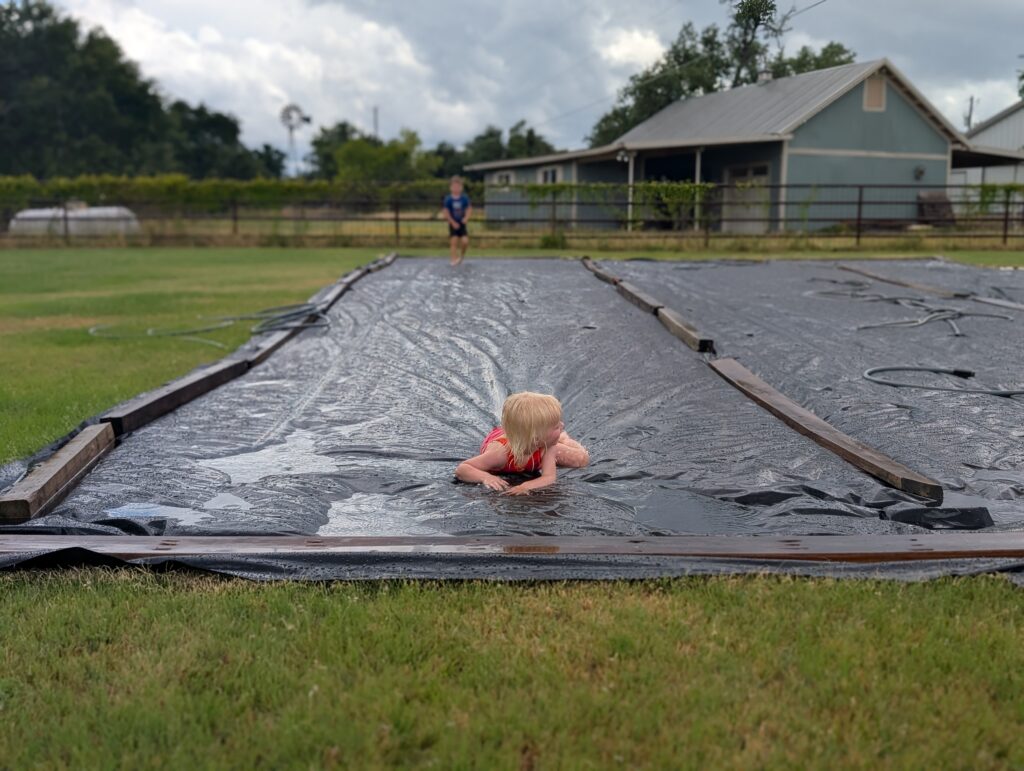
We rolled out the plastic, placed lumber to hold down the sheeting, and waited. Total occultation can take 3-6 weeks with full, direct sun. By week 4, we noticed the grass was brown under the plastic, and the roots were crispy.
Key points:
Acquire a black tarp: 6 mil, black, to desired dimensions
Cover area & hold down plastic
Wait time: 3-6 weeks, full sun
Step 3: Prepare the Soil for Your New Garden
Now that the ground is crispy, and there is no grass or weed seeds to haunt us later, it is time to turn up the soil. With our first garden, we used a skid steer to slice the grass out. This was NOT a good option, because it lowered our soil line and compacted the garden space significantly. We had flooding even with 20+ repeated annual yards of compost added. Instead, we now use a walk behind tiller to till the top 3-5 inches of topsoil. After, we will level out the ground with rakes so there is no ponding or slope. In succeeding years, we will just use a broadfork to aerate. Our goal is to not compact and disturb the microbial biome as much as possible. Charles Dowding is a great resource for all the research and reasons behind a “no-till” garden.
Key Points:
Break ground shallowly with tiller
General tilling cautions: avoid tilling seeds or rhizome grass, till only 3-5 inches deep, avoid lowering soil line
Step 4: Create Garden Borders and Walkways
Soon after tilling, we need to get on the job of creating exterior border. Grass on the outside will soon become grass on the inside unless there is delineation. It can be beneficial to occultate beyond your garden space to create a dead zone between rocks, bricks or other boundaries on the exterior of the garden. It is also very beneficial to place landscape fabric down to prevent edge regrowth. A wide exterior boundary will also help prevent clipped grass and seeds from spreading to the garden from things like weed-wacking borders.
After your border is established, create your growing and walking zones by raising soil with a rake. Rake from the walkways up into the garden spaces to create bed that are 2-4 inches taller than the walkways. Standard walkways are 12-18 inches wide to accommodate the gardener squatting to weed and harvest, as well as the size of standard rakes and some wheelbarrows. We have accumulated a chip drop from local tree trimmers to mulch our walkways to assist with weed prevention. Bed width can be determined by the amount of plants per row and their proper spacing, as well as gardener reach. Overly wide beds will mean the gardener has to enter the bed, kneel and reach, or walk around for each row. Standard garden bed size is 30” wide.
Key Points:
Prevent border regrowth: landscape fabric, delineation, extra width
Build rows & walkways: bed width matching gardener’s needs, walkways to allow for movement and tools

Step 5: Test Soil and Plant Cover Crops
This last step will often go overlooked, but if the gardener does not quickly cover open ground, nature will. Our timing leads us to have open ground entering fall. We are not eager to plant into raw ground because the soil has been disturbed recently, it is dry from occultation and most likely nutrient deprived. A mail-in soil test through the local ag department or an online soil testing company can help identify missing nutrients in the soil. Oftentimes, these test will show missing nitrogen, phosphorus, potassium, as well as list how acidic your soil may be.
Phosphorus (P): Measures available phosphate levels for root growth and blooms.
Potassium (K): Checks potash levels for overall plant vigor and disease resistance.
Nitrogen (N): Often excluded or estimated on standard lab tests because it changes rapidly, though some specialized tests measure available nitrates
These can be reintroduced into the soil at this stage of development via granular organic fertilizers like blood meal, bone meal, feather meal, etc.
Covercrops are another way to cover the soil, replace missing nutrients, build organic matter while preventing weed growth. Legume cover crops convert sunlight to nitrogen in their root systems, making it accessible to the microbiome for distribution. Tillage cover crops burrow down with their roots and aerate the soil for better oxygen circulation. Green manure cover crops die in cold (or hot) weather and break down easily for increased green matter. A combination of these cover crops will lead to a dense fall planting that will build the garden, and prevent weeds before spring planting.
Key Points:
Soil testing: identify missing nutrients, soil acidity
Covercrops: nitrogen fixing, tillage, organic matter, weed prevention
Your New Garden Is Ready to Grow
Starting a new garden doesn’t require expensive equipment or years of experience; it simply requires a solid foundation. By taking the time to plan your garden space, eliminate existing grass and weeds, prepare the soil correctly, establish permanent beds, and build healthy soil with cover crops, you’ll create a vegetable garden that becomes more productive each season. These five steps are an investment in the future of your garden, reducing weeds, improving soil health, and making maintenance easier for years to come. Whether you’re learning how to start a new garden for the first time or expanding your homestead, careful preparation will set you up for healthier plants, bigger harvests, and a garden you’ll enjoy season after season.
Read More:
Everything You Need for an Indoor Seed Starting Set-up
How to Read a Seed Packet & Source Seeds
Cover Crops: The Complete Guide to Building Healthy Garden Soil
Leave a Reply